 The Apple Watch has brought to the market a very interesting device, with several capabilities and lots of possibilities for developers.
This device is a watch, yes. But in addition, you can take calls from your iPhone without using the earpiece or microphone of that device; control your music collection and see at a glance the song titles and artists; get information about directions to travel or ask for weather forecasts; keep track of our health through monitoring heart rates and quantifying the number of steps we’ve made; and even see what happens around you from our iPhone camera.
The Apple Watch is a device with an extension (or a peripheral) of your iPhone and can be used as such. It has a screen, but it doesn’t have a keyboard or mouse or any kind of traditional interface for interacting with the device, so it should be considered as a small terminal for getting information. It can’t perform any kind of complex operations or control our digital devices in the way we’re used to seeing with other computers and smartphones.
The great thing about the Apple Watch is that developers can create apps for it, and there are several points to consider before doing so. We’re going to take a look at creating apps for Apple Watch, the things we need to know and some practical examples.
Designing Apple Watch Apps
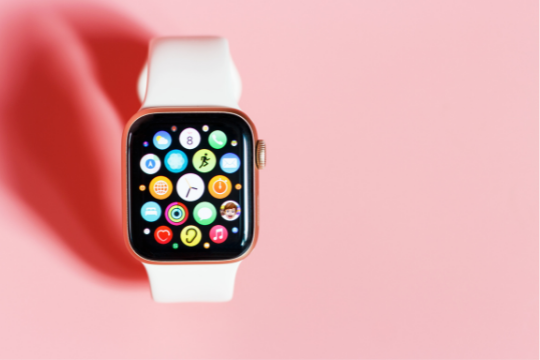
Apple Watch is a square device (1.32 inches by 1.5 inches) with a screen, and app developers can create applications for it in the same way they would do for other devices, but we must keep several things in mind when developing apps for this small terminal.
It’s not possible to know exactly how the elements in applications are going to display on a specific Apple Watch, since we can only see the screens on iPhone and not on their extension devices. Thus, it’s necessary to leave a margin of 1-2 points between buttons and images so that they don’t appear cut when seen on other types of watches.
In the case of applications with text elements and labels, these need to be bigger than on a typical iPhone, taking into account possible difficulties in reading them from watch size.
The best way to quickly get an idea of how your application will be displayed is by using the Preview app on iOS 8 for Apple Watch. The app lets you see how your design elements are going to look like when viewing them both with horizontal and vertical screen orientation.
Preparing Apple Watch Apps for Development
To develop applications for Apple Watch, you must first have access to the iOS 8 SDK because it’s necessary to submit your application to the App Store. It is free and open source so everyone can download it from the official website of Apple. Just remember that before doing so, you need to set up your Mac that will be used for developing and then install the Xcode 6.3 IDE, since it’s necessary to build apps for iPhone and Apple Watch.
Once you have done all of this, you can start testing your applications on your devices by registering developer accounts in the App Store section of iTunes Connect. You need to indicate how much you would like to spend and how much time you are willing to wait for your app to be reviewed.
The process of developing an application is the same as with other iPhone programs, but there are some things we should keep in mind:
- When working with applications that contain actionable cells, it’s not possible to use a UITableView, and thus we should use a subclass of NSObject so that the table is displayed as an outline.
- We must import the WatchKit framework in our program to enable communication between iPhone and Apple watch.
- It’s not possible to launch applications made for iOS 8 from the lock screen, and if this happens we’ll see a message telling us that we must unlock our device first.
- The applications designed for Apple Watch are launched from their iPhone, and thus we can’t use third party libraries during development. Also, it’s not possible to add buttons in the UIInterfaceOrientation.landscapeLeft mode since this will cause problems when the application is running.
- The classes in WatchKit are derived from WKInterfaceController, but they don’t support the viewDidLoad method and thus we’ll need to implement them in our program instead of using it.
- The label classes are new and they are not supported by Xcode, so we’ll have to change the name of their methods when working with them.
- An application uses interface objects like switches, sliders and action sheets that aren’t shown on Apple Watch; in order to show screen elements on a specific device, it’s necessary to specify this within the WKInterface object.
Now that we know how to develop applications for the Apple Watch, let’s take a look at some of its features.
Receiving Notifications on Apple Watch
The first thing we can do with our device is receive notifications when an event occurs in other applications, or when something important happens in the device or in a sub application.
To do this, we’ll need to specify our program’s name within the “Watch Notification” option of our iPhone program so that each time an event occurs, it will notify us with a vibration and displaying text on Apple Watch or iPhone depending on how many times you’ve pressed the digital crown of the Apple Watch.
To configure notifications, we’ll need to go to our “Summary” tab, and then assign a name for each application we wish to receive notification from. Then, with these names that Apple gives us in its official documentation, we can manage this process in our program.
The next step is to implement a method that will be called each time we receive a notification, so that we can perform actions depending on the notification. In this case, it’s not possible to present view controllers for managing notifications because they are directly shown on Apple Watch and instead of entering our application with the required data we’ll need to show some basic information.
Apple Watch has different ways of showing notifications that are just as effective as clicking directly on them, but that depend on your program’s purpose.
Adding Glances to Apple Watch
The next step after receiving data from your application is to give users a way to see its main information, like a list of the latest news or a timer that shows how much time is left for our cake to be ready. That’s where Glances come in handy; they are quick views that display the most important data on the Apple Watch and can be shown by simply swiping from top to bottom, either with your finger or using the digital crown to help you navigate through your glances.
Glances are created by using a class called WKInterfaceController; they show information on the Apple Watch and are seen on the top of our device. The data that we need to display is sent from our iPhone application but it’s not filtered or manipulated, so we’ll have to do this manually in our Glance.
The first step is to create an interface controller for Apple Watch; to do this we need to drag a new view controller inside the storyboard and then specify that it implements WKInterfaceControllerDelegate. Then, using the “Identity” inspector, assign a name for your glance.
Now that we’ve assigned a name to our glance we can create an instance of WKInterfaceController and assign it to our glance. But first, we’ll have to add a selector for the “Watch Notification” method that will be called each time we receive data from our iPhone application, in order to inform us about new news or other information.
To do so, we can use the “Implement watchKit App Delegate methods” option located on the left-hand side of our program’s storyboard; select it and then choose the appropriate method in your controller.
Now that we’ve assigned a name for our glance and assigned a selector for handling notifications, we can implement the initialization code. To do this, go back to the InterfaceController.swift file and import WatchKit.
In the “Supported Interface Orientations” section, select only the orientation you want to support; in our case, we’ll pick “Portrait” since watches always show notifications in a vertical position.
That’s it! You’ve successfully added a Glance to monitor data from iOS devices onto Apple Watch – now let’s check if everything works as expected.
To do this, you can test your Glance by using an Apple Watch simulator; to do so, select one of the four buttons at the bottom corners of your program’s storyboard and then tap on “iPhone”. Using a simulator is way easier than setting up and running tests on actual devices – especially if you need to test over multiple models like iPhone 6 or iPhone 6 Plus.
As you’ve read in this tutorial, developing an app for the Apple Watch is not that difficult. If you look at it from a developer’s point of view, having to choose between developing an app based on an iPhone or for Apple Watch might be the easiest decision you’ll ever make. The Apple Watch offers new ways of interacting with your phone, making it extremely responsive and useful; let’s not forget about the vast amount of information you can access from one single place.
Sunvera Software develops next-level software applications from start-to-finish. We are a premier software and mobile app development agency specializing in healthcare mobile app development, custom mobile app development company, telehealth software, sales dashboards, custom mobile app development services, retail software development, supply-chain software, ecommerce, shopify, web design, iBeacon apps, security solutions and unified access software.
We are proud partners with Amazon AWS, Microsoft Azure and Google Cloud.
Schedule a free 30-minute call with us to discuss your business, or you can give us a call at (949) 284-6300.